B.O.X. is the fifth boss fought in a normal playthrough and is one of the two bosses in the game which does not involve a Core-X fight.
Attacks
Jumping
B.O.X. will jump at the start of the fight, as well as after being attacked or after skidding from ramming. If Samus is above it, it will start to throw a bomb.
Samus is unable to be hit by its jumping while on the monkey bars.
Throwing a Bomb
B.O.X. throws a bomb in an arc. The bomb will explode after a few seconds and spawn two flame columns from its side which will move in an alternating high-low pattern to the walls of the room. Being in the center of the bomb when it explodes lets you dodge the flames.
After throwing a bomb, B.O.X. will throw another bomb if Samus if above it. If not, it will either go back to jumping or start ramming.
Ramming
B.O.X. will ram towards Samus, until it either hits a wall, or having switched directions with Samus. Switching directions will cause it to skid, and then start jumping. Hitting a wall will cause it to ram again.
After B.O.X. has been defeated, it will slowly crawl over to the right side of the room to jump up and make platforms appear that will let you progress.
By the time you fight B.O.X, your Missiles will do 30 damage and your Charge Beam will do 20 (26 if you hit the flare too which you’re unlikely to in this fight). Thus, Charge Beam will not shorten the fight, and you will still need 10 Missiles to defeat it.
There are two common strats to kill it: a beginner-friendly one using the monkey bars and an advanced one using damage boosts.
This video goes into both of them. Relevant timestamps are:
0:30 explanation of monkey bar strat
3:20 showcase of monkey bar strat with failing to kill early
4:20 explanation of damage boost strat
5:03 showcase of 2-round damage boost strat
6:00 showcase of 3-round damage boost strat
Monkey Bar Strat
Start the fight by jumping up and shooting a Charge Beam shot at the peak of your jump followed by a Super Missile. Then jump onto the far right of the monkey bar, and shoot at it until it starts preparing to throw a bomb. Move to the left to not get hit by it when it launches, and keep shooting until it does.
Should it manage to do another jump, move towards the far right of the monkey bar and wait for it to jump beneath you before finishing it off. This is because the jump takes far less time than the slow crawling of the death animation.
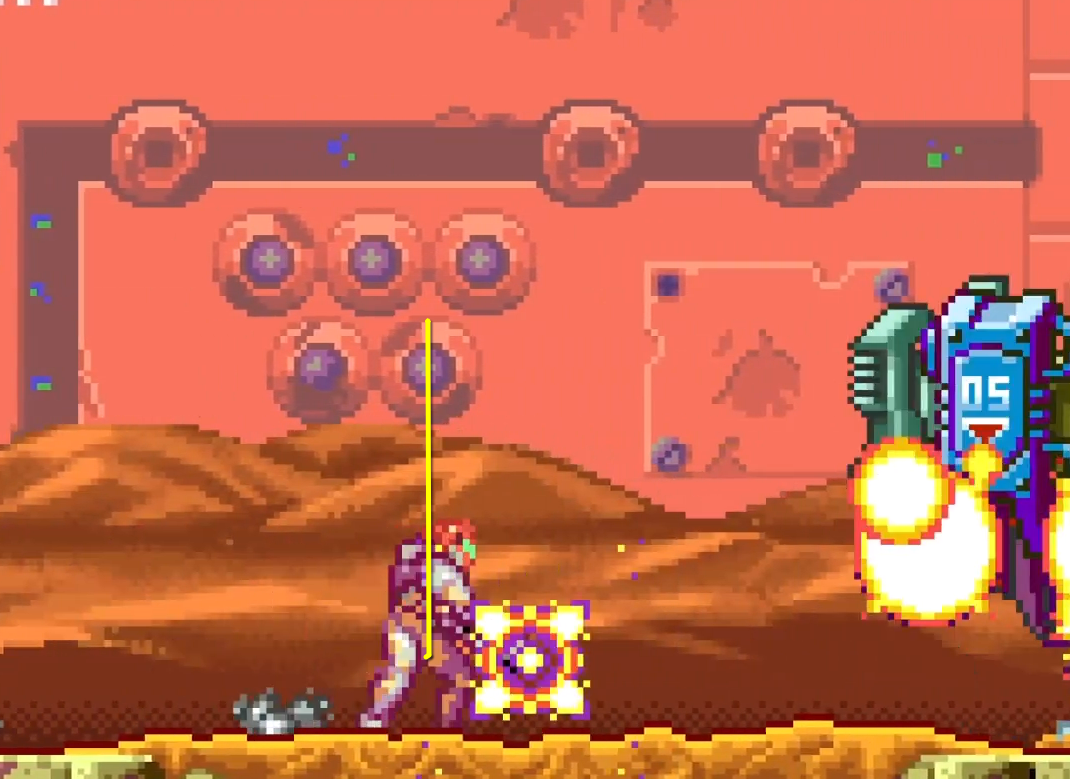
Below are some reference images for positioning:
Start the initial jump when Samus is at the center of the bottom right blue circle pad in the background.
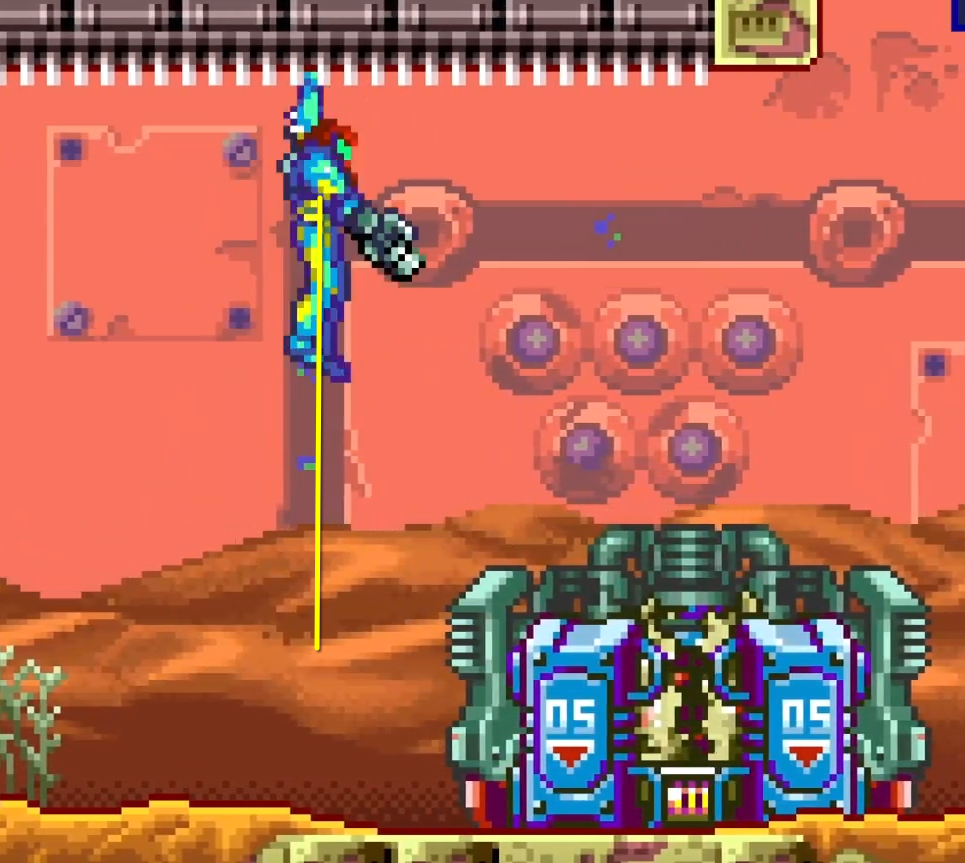
When B.O.X. is preparing to throw a bomb, position Samus so that she is in the center of the dark background pole.
Damage Boost Strat
Commonly also referred to as “Quick Kill”.
This strat has risk for quite a lot of damage if not practiced well with it.
Start the fight by jumping into B.O.X. and shooting to Super Missiles straight down into it. Get damage boosted, shoot once diagonally down, then keep shooting straight into it, while you’re in the right side of his shell hitbox. Jump out to the right wall when your i-frames are close to running out. Then Walljump, shoot 2 Missiles down and repeat.
An ideal fight lasts 2 rounds. If you don’t manage to kill it in that time, you can switch up the strategy where instead of jumping above it and getting damage boosted, you wait on the right side to get hit by the bomb and move into its shell hitbox during your i-frames. It is a bit slower but will make you take approximately half as much damage.
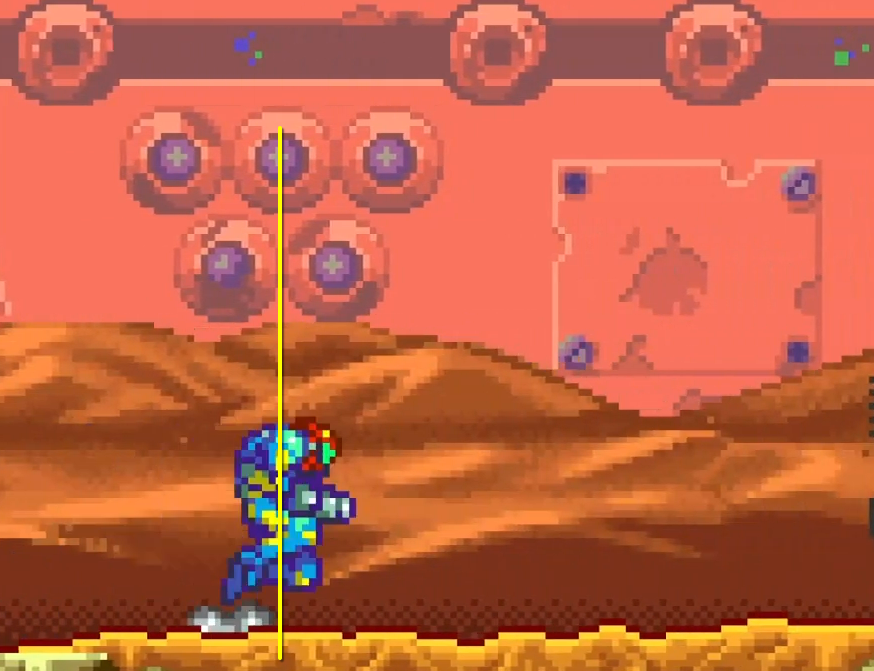
Below are some reference images for positioning:
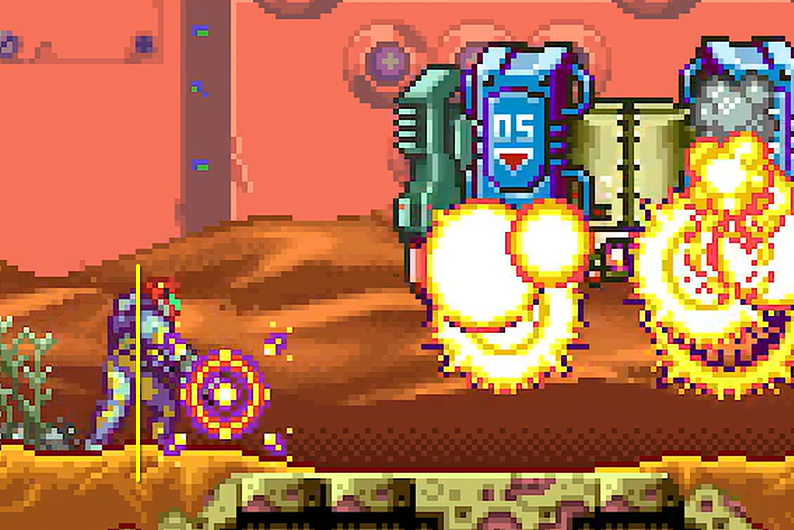
Start the initial jump when Samus is at the center of the middle blue circle pad in the background.
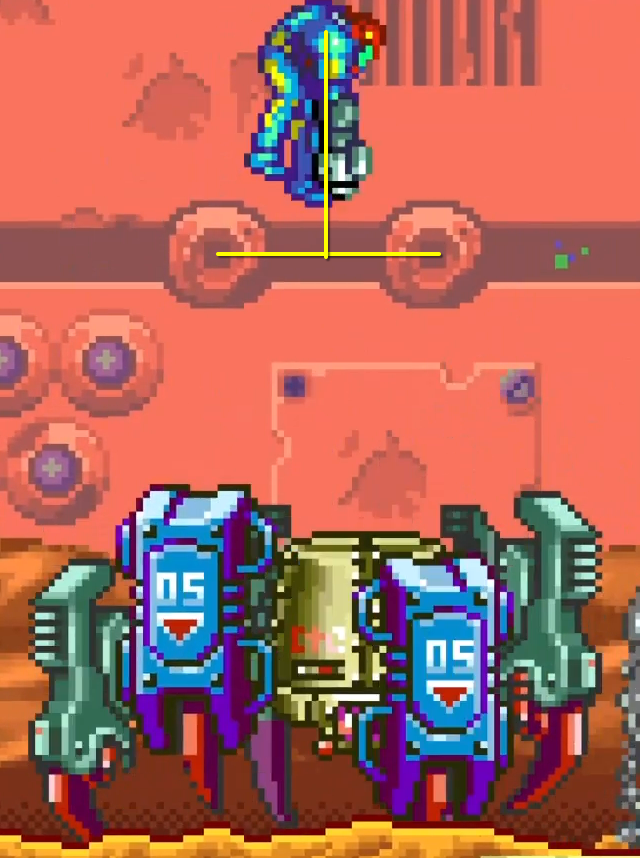
Shoot down when Samus is in between the red circle pads in the background.
Looping Strat
The movement of B.O.X. is easily manipulatable. After jumping onto the monkey bars you can keep it in a loop of:
let it throw a bomb
move to be above the bomb
wait for it to jump under you, and shoot Missiles at it. Position yourself slightly if necessary
move away
That is the safest way to deal with it, as well as the easiest way to do it hitless/without wasting any ammo. However it is also slow. Thus it’s only recommended for beginners who are too intimated by the monkey bar strat, or in randomizer situations.
(TODO: video showcasing it)
Randomizer
MFOR
In MFOR, B.O.X. spawn behaviour has been changed to appear once you have unlocked Level 2’s, and have either Charge Beam in your inventory or a way to shoot Missiles. To kill it quickly, you can adopt the speedrunning strats and repeat them as necessary based on your damage output. Do note however that they require High-Jump, being able to shoot Missiles and, ideally but not necessarily, Charge Beam.
MARS
In randomizers based off of MARS, B.O.X. will always be spawned, but has its spawn position moved further to the left. This makes it impossible to perform the standard speedrunning strats on it.
However, a variation of the damage boost strat is possible. You can see a video demonstrating it here:
Start by doing a neutral jump near the activation trigger of B.O.X. and shooting a Charge Beam and a Missile at a downwards angle. When it’s preparing to jump again, do a neutral jump while moving Samus towards B.O.X. in mid air and shoot another Missile at a downwards angle. This is done twice.
If your starting shot at it was fast enough where it didn’t move to the left, then its third jump to the right will make it bump against the wall, which is when you should be switching to the Quick Kill strat by spin jumping and shooting Missiles down at it from straight above. If your initial shot was too slow, then start the Quick Kill strat after B.O.X. jumps one more time.
From there on, you continue with the pattern of going into the shell hitbox to directly shoot at the weak spot, and jumping out of it before running out of i-frames. It’s recommended to use the fire bombs for damage boosting into it, since they do less contact damage than B.O.X. itself, and you won’t necessarily have a lot of health.
Below some reference images for positioning:
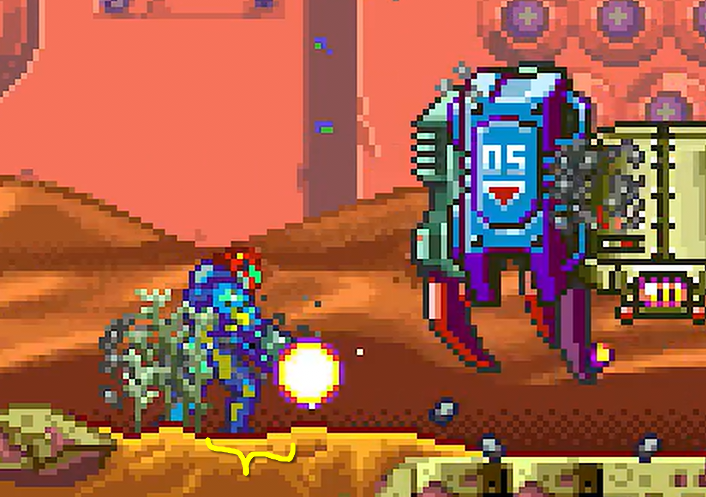
With High-Jump, start the initial jump when Samus' right foot is between the plant and the sand hill.
Without High-Jump, start the initial jump when Samus is at the center of the right sand hill.